 Am I nearly there now?! At least I'm heartened that my brain has a few grey cells left to take me into the new year! See you there!
Friday, 31 December 2010
Got it!
I looked on Bonnie Hunter's site this morning, but no more information about 'Roll roll, cotton boll.' I suppose it's not Friday yet in Quiltville. So, I checked my emails, and found that there was a lovely one from Cheri, reminding me of the red squares - which I had completely forgotten. And then 'ping' there it was - the solution to how those blooming parallelograms would fit in!
Am I nearly there now?! At least I'm heartened that my brain has a few grey cells left to take me into the new year! See you there!
Am I nearly there now?! At least I'm heartened that my brain has a few grey cells left to take me into the new year! See you there!
Thursday, 30 December 2010
1, 2, 3, 4, 5, 6 and voila!
Holiday times are such great times, but it's always good to get back to normal! Today I have been doing a mammoth clear-round and clean, and felt I could treat myself to some serious sewing this afternoon. Now all the components for (half) Bonnie Hunter's 'Roll, roll, cotton boll' are done. Hooray! And since Bonnie's last set of instructions promise that tomorrow we will start to put the components together, and I'm too impatient to wait, I thought I'd try and work out what the blocks might be like for myself. 
First try. Looking good, but rather a lot of gaps there.
 Next idea, but not much better. It's those blooming parallelograms which are the main problem. How on earth will they fit anywhere? Maybe it's better not to start with the string block.
 Oh, yes, very dynamic, but still hopeless!
I give up, and will have to wait till tomorrow. How close am I, Bonnie?
Thursday, 23 December 2010
1, 2, 3, 4 and now 5!
I'm really enjoying the Bonnie Hunter quilt I'm making. It is perfect for this time of year, when you feel the need to do some sewing, but it has to be something mindless, because you either don't have the energy to do planning and creating, you just want something repetitive to take your mind off all the streses and strains of the season or you only have time for a few minutes sewing! I'm only planning a smaller quilt, so have just made half the reqired blocks, until I see where it's heading.
 Step one, pink and green 3-strips.
 Step 2, pink and brown half square triangles.
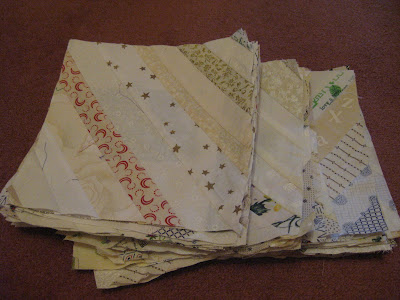
 Step 4 (quick and easy), green and neutral 2-patches and squares.
Step one, pink and green 3-strips.Step 2, pink and brown half square triangles.Step 3 (my favourite so far), string-pieced blocks. And I was very good after I'd done them all, and cut whatever remained into useable 2", 2.5" etc strips and squares, and had only a few pieces to put into my strings bag!
Step 4 (quick and easy), green and neutral 2-patches and squares.
Friday, 17 December 2010
Another start
On Monday, I had no quilts to finish, no housework to do, no Christmas shopping or baking to do, so I decided to start another quilt. (My nose has just grown about 15 inches, by the way, after all those lies!) Anyway, I looked on Bonnie Hunter's website, as I so much enjoyed making her 'Christmas Lights' design last year, and she has another new quilt! It's called 'Roll, roll, Cotton boll' and what really appeals to me is Bonnie's instructions that you shop in your stash first, and then, if you can't find what you want, get your purse out! Here is the first set of blocks.
 I only made half as many, as I didn't want a huge quilt - or can decide that later! I was pleased to find that all the greens came from my 2" strip box!
 I skipped the second set, as I was so excited at using strings and strips. I've never used telephone book paper as a foundation before, and enjoyed not only the thriftiness of it, but also the ease of tearing away! (I usually really hate taking out foundation paper!) Hope we don't need to find the number of anyone whose name begins with 'A' before we get a new phone book!
And here are some of the finished string blocks. Bonnie encourages you to use anything with a white/cream background, which gave me the chance to use this strange black/white/red fabric which I bought from a vintage shop some while ago. This is definitely my kind of patchwork!
I only made half as many, as I didn't want a huge quilt - or can decide that later! I was pleased to find that all the greens came from my 2" strip box!I skipped the second set, as I was so excited at using strings and strips. I've never used telephone book paper as a foundation before, and enjoyed not only the thriftiness of it, but also the ease of tearing away! (I usually really hate taking out foundation paper!) Hope we don't need to find the number of anyone whose name begins with 'A' before we get a new phone book!And here are some of the finished string blocks. Bonnie encourages you to use anything with a white/cream background, which gave me the chance to use this strange black/white/red fabric which I bought from a vintage shop some while ago. This is definitely my kind of patchwork!
Thursday, 9 December 2010
It must be that time of year!
I'm getting in the Christmas mood, and as usual, have decided to make a few special cards for close family. Here are two which are ready to post.
 They were really fun to make, and kept me busy for an evening of tv rubbish viewing.

 Next I put different cream fabrics round to frame the pictures.

They were really fun to make, and kept me busy for an evening of tv rubbish viewing.I started with some vintage Christmas images which I printed out onto fabric. (I foolishly used pretreated fabric, then realised I could have used just plain cotton ironed onto freezer paper, as nobody washes a Christmas card!) There are lots of images on Google, so have a brouse.
Next I put different cream fabrics round to frame the pictures. Then came the fun bit. A bit of a rummage in my lace and ribbon boxes to find suitable decorations, and a play with decorative stitches on my machine, and metallic threads. The final touches were a bit of hand embroidery and some beads or sequins.
The hardest part was enlarging the aperture cards to accommodate the different shapes of the final desin. Now I have to brave the queues at the post office to get them weighed - wouldn't do to send a lovely card which costs the recipient money, is it!
Sunday, 5 December 2010
Celtic Knots
The current block from my challenge group is the Celtic Knot. This is where a bias strip of fabric is wound over and under itself to make a geometric pattern, usually endless. These designs were originally found in manuscripts and carvings made by the Celts in Britain (pre 1000 AD), and are wonderful. Since my blocks are smaller than everyone else's, I had to find a simpler design. Luckily my friend Di has a collection of books with Celtic designs, and I found this one from the Book of Kells.

DH is away on business so I had some time yesterday to get on with these blocks. My first problem was to trace the design onto the light blue fabric. I generally use the window as my light box, but it was dark by the time I realised I needed daylight! Well, they say necessity is the mother of invention, so how's this for an idea?
 I balanced my 12.5" square ruler on my sewing machine and a handy box, put a desk lamp underneath, and the design (and fabric) on top! Worked like a charm. In case you're interested in what I used to mark the knot, it was tailor's chalk. It showed up beautifully on the blue, and was soft enough not to drag the fabric.
 As to the assembling of the knot, I used a Clover tape maker with fusible web. This made it fairly easy to make the tape and position it on the fabric ready for sewing. Here's the next one ready to complete. If you see me soon, and hear me mumbling, 'Over, under, over, under,' you'll know why!
Thursday, 2 December 2010
Secrets and snow
I have been busy sewing, but not anything I can share! I am making a Christmas gift for someone who reads my blog, so that will have to keep under wraps (literally!) until after Christmas. Jane and I are organising a sewing day for Rocheberie Quilters in January, and I've been making blocks for that. It's a mystery day, so that's got to stay secret too!
 This is from my front window,
 and this is from the back. Lovely to look at, but not much fun for the traveller.
So the only things I've got which are worth showing are photos of the weather.
This is from my front window,and this is from the back. Lovely to look at, but not much fun for the traveller.Right. Back to my sewing machine!
Monday, 22 November 2010
Quilt as you go
I've been sorting out my (many) Linus boxes this week, and I came across a set of blocks which were already quilted and just needed to be sewn together. They are all in bright colours and it seemed a shame not to put them together, so I decided to have my first try at quilt as you go! Firstly I auditioned sashing colours. Nothing seemed quite right, so I decided to sew them together - wadding and all - and then use a strip at the back to hide the raw edges.
 Here are four of the blocks - very gutsy, as you'll surely agree!
 I cut a strip about 1" wide, the length of the blocks, and placed it right side down on the edge of the blocks I was going to join together.


Here are the two blocks from the front. Looking good. Now I'm off to watch the tv and sew the strips on the back!
Here are four of the blocks - very gutsy, as you'll surely agree!I cut a strip about 1" wide, the length of the blocks, and placed it right side down on the edge of the blocks I was going to join together.I sewed straight through the blocks and fabric strip.
Then I folded the strip over, turned in the edge, pinned and slip-stitched it. (It would have been even easier if I'd ironed the strip under down the free edge, but hindsight is a wonderful thing!). Since the blocks have been quilted right to the edge, it wasn't possible to trim the wadding, so the seams are a little bulky. Never mind, it'll just add to the snuggle factor!
Here are the two blocks from the front. Looking good. Now I'm off to watch the tv and sew the strips on the back!
Friday, 19 November 2010
Too many tops
I don't know a single quilter who says, 'Oh, I'm just going to layer up my latest quilt. Really looking forward to it!' Piecing is something most people enjoy, and then others like quilting, but the layering up is nobody's favourite. And that includes me! I've been busy piecing lately, and have now got too many tops!
 This is a cot quilt DS started for a friend of his while he was 'resting' earlier this year. All the nine-patches were done, and it just needed assembling. The baby was born about 6 months ago, so I've given him a helping hand, now he's working.
This is a cot quilt DS started for a friend of his while he was 'resting' earlier this year. All the nine-patches were done, and it just needed assembling. The baby was born about 6 months ago, so I've given him a helping hand, now he's working.Now I'm retired, I've been doing a little teaching - teaching quilting to adults is much easier than teaching language disordered children, though just as rewarding! This is a class sample which will no doubt end up on its way to Linus.
 I've also been running a beginners' cot quilt class, and here is the sample for that. The ladies in this class were real beginners (which is fine by me) and one of them didn't even know what a seam was! Well, she knows now, and the local quilt groups will be benefitting by getting some new members generated by the class!
 And of course, I'm rarely without a Linus quilt on the go. This one was made in response to a request from a 5 year old girl with cancer who loves princesses. Apparently her mother applied to the 'Make a Wish Foundation' for the opportunity to take her to Disneyland, unsuccessfully. This Disney princess panel and matching fabric was in the donated bag, which made the quilt very easy to complete. It won't win any competitions, but hopefully it'll win a little girl's heart.
Now to layering up. What joy!
Friday, 12 November 2010
Couldn't resist!
Last week we had a Project Linus sewing afternoon, and Jackie, Eileen and I made a lot of blue half square triangles. This is an attempt to try to use some of the donated fabrics, and also, to make some boyish quilts. I have had a request for 5 quilts for disabled youngsters entering foster care, and they're all boys! I have lots of donated quilts, but none were really boyish, hence the half square triangles.

Here are some of the triangles made into pinwheels, and bordered with a nice construction vehicle fabric. Here is a close up of the border fabric. I think a boy would like it. My next job this afternoon is to layer it up, so what do you think I've been doing? Yes, not layering up, but trying a new block!
  This block is called 'arrowhead' and looks pretty complicated. Not the way Anita Grossman Solomon shows in the current edition of 'Quiltmaker'. You just have to cut two 8" squares, do a little straight sewing, some easy cutting, and hey presto! you have all the pieces you need for the block. Join them together and trim, and it's only taken a few minutes to make! Now, shall I make a few more arrowheads just to make sure I know how to do it, or layer up? Hmm......
Here are some of the triangles made into pinwheels, and bordered with a nice construction vehicle fabric.
Here is a close up of the border fabric. I think a boy would like it. My next job this afternoon is to layer it up, so what do you think I've been doing? Yes, not layering up, but trying a new block! This block is called 'arrowhead' and looks pretty complicated. Not the way Anita Grossman Solomon shows in the current edition of 'Quiltmaker'. You just have to cut two 8" squares, do a little straight sewing, some easy cutting, and hey presto! you have all the pieces you need for the block. Join them together and trim, and it's only taken a few minutes to make! Now, shall I make a few more arrowheads just to make sure I know how to do it, or layer up? Hmm......
Sunday, 7 November 2010
Bit of a theme
Having had all the pieces for a Linus patchwork top donated was great, but then I needed to find borders. I was lucky to find some pink in my stash, and then went with Pauline on a fabric-buying expedition (she was supposed to be buying, not me!) and found a lovely turquoise spot which was perfect for the border.

Here is the finished quilt, which will very shortly be on its way to a 14 year old girl with cancer.
The turquoise spot turned out to be very handy, as I found it was the ideal match for some Michael Miller fabric I was planning to make a bag with. 
This bag is my original design - by which I mean that all the components are taken from various other bags, resized and reorganised. After all, a bag's a bag! I'm particularly pleased with this one, as I've finally mastered a zipped pocket inside it!
 Here you can see the zipped pocket in the lining, and an ordinary set of flap pockets. The bag is for a workshop after Christmas, and I hope people like it enough to want to make it!
Sunday, 31 October 2010
Linus crazy!
I have been busy sewing, honestly, but this retirement business is fraught with people wanting to meet you for lunch, for coffee, for shopping etc. and I'm really enjoying saying 'yes!' This week though, I've had two requests for Linus quilts. One is for a 14 year old girl with cancer who loves textiles - got to get a quilt to her in double-quick time - and the other for five disabled children who are going into fostercare, all boys. Of course, I have very few Linus quilts at the moment, as I've just made a big delivery to the refuge, so am trying to make a some quilts up to suit. Here is the one for the 14 year old girl (who loves pink).

The fabric in the centre was 'left over from a project' and donated to Linus. How can so much coordinating fabric be left over? Well, it's a good job we're not all scrap quilters like me, as there would be no donated scraps to make charity quilts from!
 Here is the completed top from the pattern in McCall's Quilting. It's nice and gutsy and will be good for a boy, I think. And finally, I have put together these scrappy blocks which were made at a recent Linus sewing afternoon.
 This will make a great cot quilt. Can you see DH peeping through the border fabric on the last two quilts? This donated fabric isn't very good quality, and while it will be fine for these children's quilts, shows its faults when held in front of a window. Now I need to get layering and quilting!
Sunday, 24 October 2010
Presents
I recently had a big birthday, and my parents gave me some money, with a note, saying, 'Buy something you would like with this.' Now, I'm very grateful, but I am fortunate enough to have modest needs, and the income to indulge myself in most of the things I want. So, the money sat in the envelope until this week, when I have used it to treat myself to a new sewing machine!
 Now I am retired, there seem to be so many opportunities to go places where I can take my machine and sew, and I was getting tired of packing up and unpacking my machine so decided the time (and the funds!) were ripe for the purchase of a small model to pick up and go with. I went to a lovely shop 'Sew Northampton' where there was plenty of advice, and no sniffing at my small budget. In the end I went for this Janome, because it has all the features of my big machine (needle down, top bobbin, thread cutter, speed control etc) and would allow me to use my darning, quarter inch and walking feet without having to buy more. So far, I'm delighted with it, and am planning to take it out for a test run this week!
Now I am retired, there seem to be so many opportunities to go places where I can take my machine and sew, and I was getting tired of packing up and unpacking my machine so decided the time (and the funds!) were ripe for the purchase of a small model to pick up and go with. I went to a lovely shop 'Sew Northampton' where there was plenty of advice, and no sniffing at my small budget. In the end I went for this Janome, because it has all the features of my big machine (needle down, top bobbin, thread cutter, speed control etc) and would allow me to use my darning, quarter inch and walking feet without having to buy more. So far, I'm delighted with it, and am planning to take it out for a test run this week!Then two friends have given me presents this week too! Jane was shopping when she saw this fabulous calendar in a bargain book outlet. She bought one for herself, and one for me! Thank you so much, Jane. It was a lovely thought, which will give me pleasure for a whole year!

Then my friend Gill said she too had something for me. She had picked up this car sticker, and thought it was perfect for me. It certainly is, and I lost no time in fixing it in the back windscreen of my car! Got to spread the word!

The next present was given to me at the latest meeting of my quilt group, Piecemakers. This group was started by myself and four friends just ten years ago, in Novemebr 2000, and so this month we had a birthday party, where we invited lots of the former members. All the original members were given a present of a rose plant, and we had a lovely evening with refreshments and lots of chat.
 It was a special evening, with people coming together to share their love of patchwork and quilting. I thank everyone for their support for the group over their years, and for enriching my life with their friendship. Here's to the next 10 years!
Monday, 18 October 2010
Material girl
I couldn't have made a trip to the USA without hoping to buy some fabric, and in that I was very successful! I asked the lady in the hotel in Portland whether she knew anywhere to buy fabric, and she directed us to an outlet called 'Mardens' which had bolts and bolts of fabric (along with everything from stationery to three piece suites!).


The phot looks like I bought a whole stack, but I'm holding the packet up vertically!

I managed to track down a Judie Rothermiel toile fabric, a nice Linus fabric with football boots on it and a fabric which said 'Quilters are Piecemakers' which, since my local quilt group is called Piecemakers, I couldn't resist!
 I really wanted to find a proper quilt shop, and when we stopped for a coffee in Wilmington, I was delighted to find this one.
 It was a real rabbit warren of a place, with rooms opening off rooms in a delightful way. I was tickled to see they sold rulers made by my home company 'Creative Grids', and gave their emblem of the Leicestershire fox a little stroke! I was determined to stay true to my resolution to buy what I needed rather than wanted, so while they had a tantalising selection of autumn prints, (and lots of other gorgeous stuff) I bypassed them. I finally ended up with a layer cake of reproduction fabrics, which I need for my challenge quilt.
I really wanted to find a proper quilt shop, and when we stopped for a coffee in Wilmington, I was delighted to find this one.It was a real rabbit warren of a place, with rooms opening off rooms in a delightful way. I was tickled to see they sold rulers made by my home company 'Creative Grids', and gave their emblem of the Leicestershire fox a little stroke! I was determined to stay true to my resolution to buy what I needed rather than wanted, so while they had a tantalising selection of autumn prints, (and lots of other gorgeous stuff) I bypassed them. I finally ended up with a layer cake of reproduction fabrics, which I need for my challenge quilt. The phot looks like I bought a whole stack, but I'm holding the packet up vertically!
Here are the fabrics, along with a fat quarter I bought from Shelburne. And to prove I really 'needed' them, I have already incorporated one of the designs in my latest challenge block.
 This little beauty finishes at 8", which makes it quite fiddly. The worst of it is that I have another three to make! Better get back to the sewing machine!
Wednesday, 13 October 2010
Fabulous New England!
I have just returned from a ten day holiday (or vacation, as they say!) in New England. We flew into Boston and had a couple of nights there and then picked up a car to drive round the area, look at the leaves and anything else of interest, with the hopes of a few quilts and quilt shops too. We had a fabulous time! The weather was fairly kind to us (it only really rained for one day, and we had three whole days of glorious sunshine), the beds were clean, comfortable and soft, the natives were friendly and went out of their way to be helpful and I am now a convert to the charms of Sam Adams's ale!
 Here is a typical vista in the Green Mountains.
 Here is DH standing on a covered bridge. They are also called 'kissing bridges' as the darkness and privacy afforded the chance for a little romance! They aren't covered for that reason, but to protect the road and structure from the weather, and also because the whole bridge became much more stable and secure.
  I hadn't realised what a big deal pumpkins are, and we saw them everywhere. Some were small and cute, and others monstrous - literally up to about three feet in height! This selection was outside a house in Deerfield. I don't know if they were for sale or just decoration.
  Most houses had some Halloween decorations out, usually chrysanthemums and pumpkins , with corn stalks, scarecrows, ghosts and skeletons as optional extras! Some of the decorations were very humorous, such as the scarecrow bending over, to reveal two pumpkins placed strategically peeping over the back of his trouser waistband! (We'd passed that one by before I had chance to snap it!)
The best colours were at the start of the holiday when the skies were grey and I didn't take any photos, but the leaves varied all the way from green, through yellow-green, yellow, ochre, orange, peach and crimson to burgundy! Apparently it's only in New England and Japan that the tree varieties and soil conditions are right for such an amazing display. If you've ever thought it was 'just leaves' I can tell you that the whole are is well worth a visit, especially in the autumn. 
Here are some lovely trees in the Hancock Shaker Village showing yellow-orange and orange leaves. 
This row goes all the way from green, yellow-green, ochre, orange to red.
Here is a typical vista in the Green Mountains.Here is DH standing on a covered bridge. They are also called 'kissing bridges' as the darkness and privacy afforded the chance for a little romance! They aren't covered for that reason, but to protect the road and structure from the weather, and also because the whole bridge became much more stable and secure. I hadn't realised what a big deal pumpkins are, and we saw them everywhere. Some were small and cute, and others monstrous - literally up to about three feet in height! This selection was outside a house in Deerfield. I don't know if they were for sale or just decoration. Most houses had some Halloween decorations out, usually chrysanthemums and pumpkins , with corn stalks, scarecrows, ghosts and skeletons as optional extras! Some of the decorations were very humorous, such as the scarecrow bending over, to reveal two pumpkins placed strategically peeping over the back of his trouser waistband! (We'd passed that one by before I had chance to snap it!) Here's another glorious tree with red-orange leaves. Compare the red of these leaves with the next photo.
  This one is much redder - sorry about the telegraph pole!
 Now for the quilts. We went to Shelburne, which is a kind of collection of collections, and they had an exhibition of crazy quilts. This one was made by two sisters aged 11 and 14 for their 23 year old sister on her marriage. Her initials and the date are in the middle. The pieces were all edged with white fabric before being joined together. I couldn't really work out exactly how it had been made. The easy way would have been to applique the coloured scraps onto a white background, but that didn't seem to be how it was made at all.
 This quilt is a more traditional example, with the craziness being tamed by being made into blocks.
 Here a few blocks have been added, but still in usual crazy bright silks and black. The flag dates the quilt quite precisely by the number of stars. (Sorry, I can't remember how many there are!)
 This crazy quilt is unusual in that it has a plain centre. This has been embroidered with flowers, birds and butterflies. The crazy blocks have been added around the egde, and are creeping into the middle portion too!
This quilt is one of my favourites. It's a string star. It's so lively and jolly. But when you look closely, there's a mystery.
How have these blocks been made? I had thought the shapes making up the star (triangles and squares) would have been made from strings and then sewn together with white fabric. But looking closely, you can see that the strings go from the centre of the stars into the points with no apparent join. Yet the stars haven't been appliqued, and are definitely pieced. Any ideas?
Subscribe to:
Posts (Atom)